Network Setup Guide
1. Overview

2. Router Setup
Login to Router admin page. Usually, it is one of the following addresses:
Default password maybe login: admin / password: admin
You may also look at the information sticker on the router, usually on the bottom of the router for above information.
a. LAN configuration
Find the page to change LAN IP and update the default router IP to 10.10.10.1

Once the IP address has been changed, it will ask you to reboot the router and you will have to login to the admin page with the new IP address: http://10.10.10.1
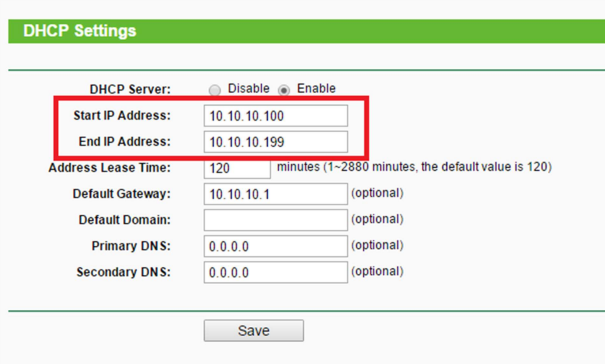
b. DHCP Setting
Change the DHCP IP range from 10.10.10.2-199, so that when you are making Static IP for credit card terminal and kitchen printer, router would not auto assign those IP addresses.
c. Static IP / Address Reservation
There are two ways to make fixed IPs for the credit card terminal and kitchen printers. It is recommended to utilize Address Reservation feature from the router if available.
To utilize Address Reservation, make devices (kitchen printers, credit card terminals, etc) to use DHCP mode and plug them to the router. This will reveal their MAC addresses in router setting.
Go to DHCP – Client List and find their respective MAC addresses

Once the device is identified, copy the MAC address and add it to Address Reservation Section.

For reserved IP address, we recommend to use the following format:
10.10.10.201 – 10.10.10.209 for Kitchen Printer 1 through 9
10.10.10.211 – 10.10.10.219 for Credit card terminal 1 through 9
When all the MAC and IP are reserved, restart all devices that you’ve reserved IP so the devices can pick up new addresses.
3. Network Share
If you are using only one computer, this section can be skipped
a. Main Station Setup
We need to make sure that Main POS can be accessed properly without knowing the IP. Sometimes it is beneficial to assign a fixed IP to main POS but it depends on the router capability and features.
Change the name of the main POS as MAIN from following setting:
Windows start > Setting > System > About > Rename this PC
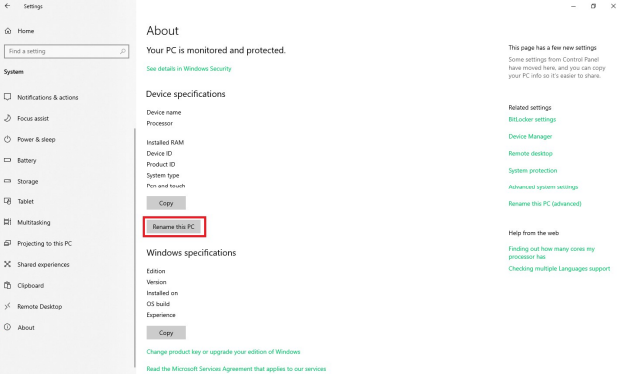
Note: This action will require a system reboot
b. Private Network
For the security reason, make sure your POS are connected with Private Network
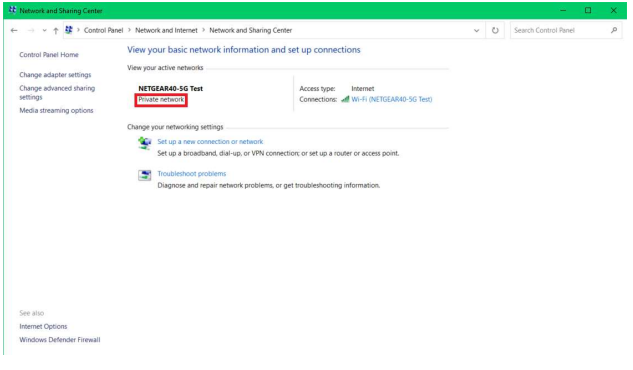
Go to Control Panel > Network and Internet > Network and Sharing Center > Change advanced sharing setting.
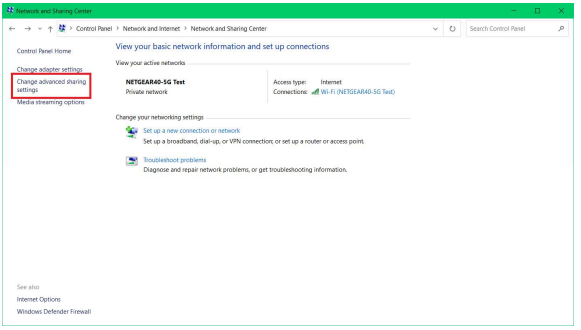
Make sure to enable Network discovery and File and printer sharing on for PRIVATE.

Scroll down to All Networks and turn off the Password protected sharing

c. Network Shared Folder
Designate a folder to be used as command data storage and enable full control on Everyone.

Note: DO NOT make C drive as your shared folder, as it will not work
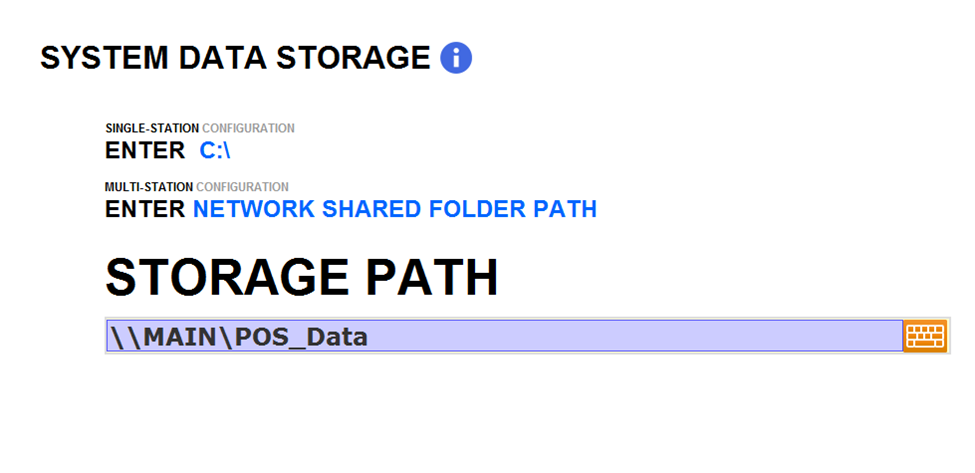
4. POS Setup
Add the network shared folder into Shared Storage Path